
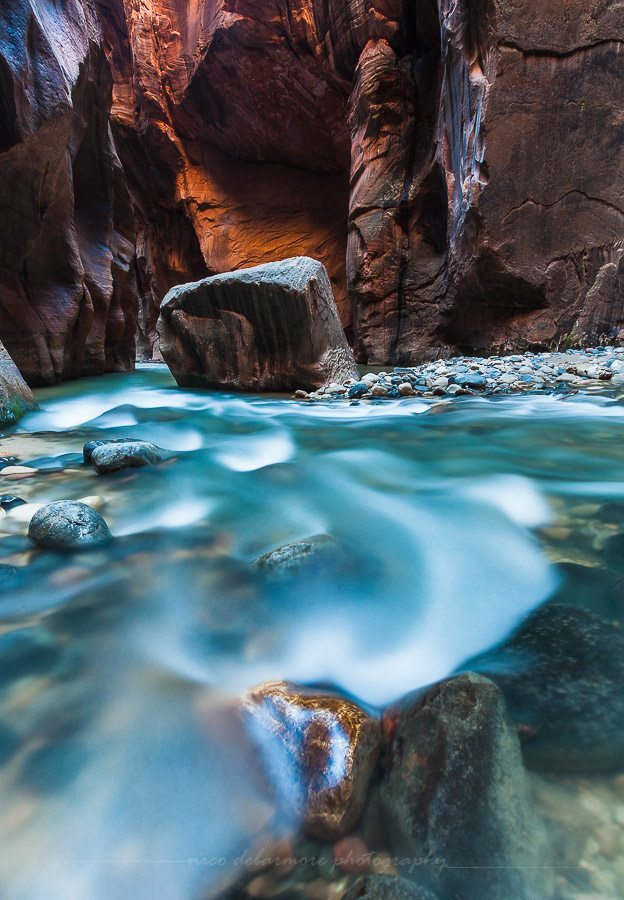
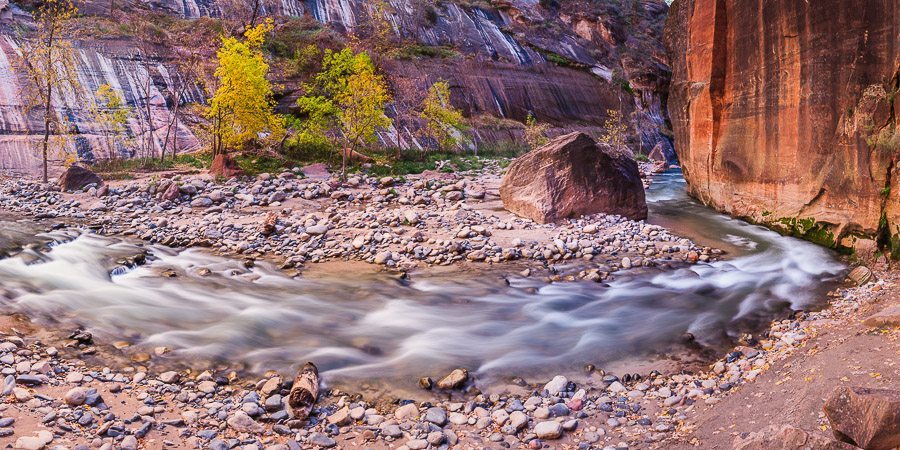
There is something magical about photographing fast moving water. We generally find a cascade in a relatively remote setting – they are in the mountains and canyons, not in urban cities. The water engulfs our senses, filling our ears with a soothing gurgle or a great roar, and perhaps covering our with skin chilled droplets or chilling our legs as we wade into the stream. It is this natural wonder of water – which brings life – in combination with what our camera reveals from the scene that our eyes cannot see. Snap an image at a fast shutter speed – 1/500 sec – and indiscernible droplets will freeze in midair. Slow the shutter speed down to 2+ seconds and the jumbling and bubbling of the water transforms into silky flows. We are only capable of regarding the water in the instant we see it, but our cameras can collect this visual information over many instances and reveal elegant swirls and patterns within the flow.
Equipment
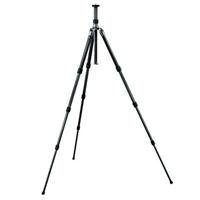
For starters, there is essential equipment for making long exposures of waterfalls and cascades. Most important of all is a tripod. Without a tripod your hands will waver and shift, no matter how still you attempt to hold your camera, and you will be left with a blurry mess. The tripod will secure the camera in place and render all stationary parts of your image – rocks, tree trunks, etc – stationary, while the water flows past and blurs in the exposure. I cannot emphasize enough how important it is to have a great tripod. If you are shooting landscapes, you will be using your tripod for many, many years, so I suggest you splurge and get the best you can because you will have this thing for a long time. I prefer Gitzo’s carbon fiber traveler series because they are compact and pretty darn light too.
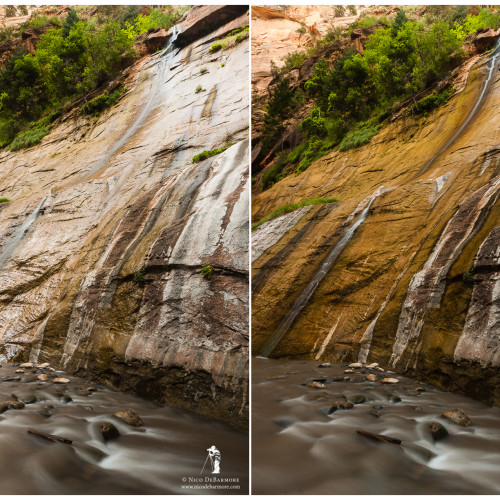
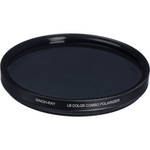 Next, I would recommend the use of a polarizer. The effect of the polarizer is two-fold. First, the polarizer will cut reflections and glare from water and reveal the saturated color beneath. Not only does this affect the flowing water, but also rocks or leaves covered with water, and even other subjects. Take a look through your camera and start twisting your polarizer and you’ll find it affects much more than just the sky and the river. Second, the polarizer adds a degree of neutral density in front of your lens – that is, it is going to darken your lens without adding any color cast (that’s the neutral part). This will make it easier to reach those longer multi-second shutter speeds. It will also make it more difficult to compose using your viewfinder. I use the fantastic LB ColorCombo from Singh Ray, which combines a circular polarizer with a color intensifier to yield really incredible results. This filter has 2 stops of neutral density as well. Singh Ray really is top of the line when it comes to filters.
 If it is really bright outside, a neutral density (ND) filter can come in handy. A neutral density filter is simply a piece of glass or acrylic that is dark but neutral in color. This allows the photographer to expose for a longer amount of time and get that nice silky smooth texture on the water. This item is not essential, but can be helpful in certain situations. Usually I am fine with just a polarizer, but if it is crazy bright out, I use the the Lee Big Stopper, a 10-stop glass filter. Not all situations require something as drastic as the Big Stopper. Lee, Singh-Ray, and several other companies manufacture neutral density filters in various densities to match any requirement you may have. In reality, optimal conditions for photographing waterfalls is overcast skies or diffused light, as bright direct sunlight often turns into blown-out highlights even when a neutral density filter is used. The other benefit of owning a set of neutral density filters is that you can use them in situations other than waterfall photography. For example, the Big Stopper can be used on dry landscapes to extend shutter speed from 1/30th second to 30 seconds, allowing passing clouds to blur into abstract streaks in the sky. This look isn’t for everybody, but it sure can add some drama to a scene.
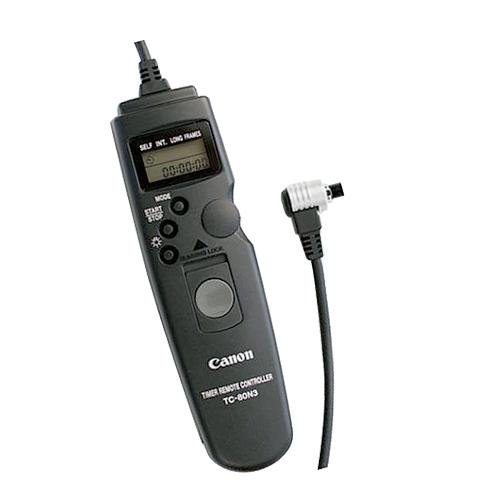
The last piece of equipment I’ll mention is a trigger. By using a trigger that plugs into the side of your camera, you avoid pressing the shutter release button on your camera and thereby avoid any associated shake that occurs when you press that button. It may seem like overkill, but if you want really sharp images, this is the way to go. The trigger doesn’t need to be a fancy intervalometer – a $10 trigger from China will work just fine. An even cheaper but less convenient alternative to this is using the 2 second timer on your camera so that when the photograph is taken, you aren’t touching the camera. If you are buying a cheapo trigger, make sure it allows you to at least hold the shutter open in bulb mode so that you can accomplish exposures greater that 30 seconds (usually a limit in the camera). Also, be sure to purchase the correct trigger for your camera – different models and brands use different connectors.
This is Part 1 of a two part series primer on photographing moving water. In the next part, I will get into how to actually take the photos. Go to Part 2!

Leave a reply